
 An auto attendant is an automated receptionist that routes calls based on the key that the caller presses.
To begin creating an auto attendant, first navigate to the "Auto Attendants" tab within the domain view, as pictured above.
From here, click "Add Attendant".

Now the Auto Attendant configuration panel will show up.

1 - Name: Give a name to the Attendant.
2 - Extension: Set the extension number for this attendant.
3 - Warning Tag: When you create this attendant, it will create a system user along with it to manage the routing (see Understanding The User for more information about system users). However if you enter an extension number that already belongs to another user, it will overwrite that user. This tag will change from "New" to "Warning", like below:

4 - Time Frame: Pick the time frame that this Attendant will use, if you select default the attendant will be active at all times, however if you pick a custom time frame, all calls to the attendant will route the voicemail inbox of the System User that the attendant is using during periods of time outside of the specified time frame (you can change this routing by navigating to the answering rules of the system user and modifying the routing, see How do I configure answering rules?).
You will notice there is not much to configure here, this is because you need to save this first and then you can make further changes.

After clicking "Add" you will be shown the above configuration Page
1 - Menu Prompt - Configure the auto attendant greeting message.
2 - Dial Pad Menu - Configure what each button does
3 - Attendant Options Panel - Extra configuration options and speech key words.
Menu Prompt
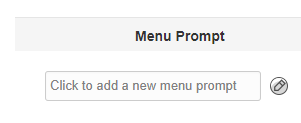
The Menu Prompt is the greeting message that plays when a caller dials into the auto attendant, a common format for Attendant Greetings is something along the lines of "Thank you for calling <company_name>, please select from one of the following options so we can connect your call, press 1 for <department_1>, press 2 for <department_2>, etc..."
Click the "Edit" button to bring up the greetings configuration panel, this is the same panel used for uploading any other greetings to the platform, to understand the platform greetings panel see What options do I have when uploading greeting messages?.
Dial Pad Menu
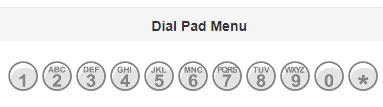
This is where you configure the routing to happen upon each button press, click the button you want to configure to see what options are available.

As you can see, there are 10 different routing options you can configure for each number, these are
1 - User: Send the call to a specific user.
2 - Conference: Send the call to a conference bridge.
3 - Call Queue: Send the call to a Call Queue.
4 - Directory: Play the domain's audio directory.
5 - Voicemail: Route the call to a user's voicemail inbox.
6 - Voicemail Management: Direct the caller to their voicemail management IVR (internal callers only).
7 - External Number: Divert the call to an external number.
8 - Play Message: Play another greeting message on button press.
9 - Repeat Message: Repeats the Attendant menu prompt.
10 - Add Tier: Adds another tier of options with another greeting message.
User
 When routing to a user, you are prompted to enter the name or extension of the user you want to route to, and set a caller ID prefix
The caller ID prefix is a short word or phrase that is prefixed to the caller ID of the call, in the above example "Ted Grove" is receiving the call with the prefix "Sales", this means if someone dials into this attendant and presses option 1, Ted will receive a call on his phones and the caller id will have the word "Sales" written before the number, that way they know where the call came from.
Conference
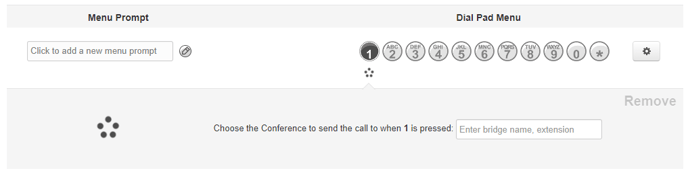
All you need to do for a conference is to enter the name/extension of the conference bridge.
Call Queue
 Like with a user you need to enter the extension of the queue you're routing to, and you have an option to configure a Caller ID Prefix.
Also you have the option to set an announcement that plays before the routing telling the caller if there is any people in the queue waiting and how many, or telling them the current average wait time of the queue.
Audio Directory
 Nothing is required to be configured here.
Voicemail
 All voicemail routing requires is the extension/name of the user that the voicemail belongs to.
Voicemail Management

Nothing is required to be configured here. Voicemail management is simply the voicemail IVR for the user currently calling in, this is for internal callers only.
External Number

Enter the external number you wish to divert to here, it can be formatted in a local UK format such as "0333 188 7878", or it can be formatted in E.124 like "443331887878".
You can also put billable numbers in here such as international or premium numbers, be aware though that doing this will cause you to be charged for these calls and not the callers coming in.
Play Message
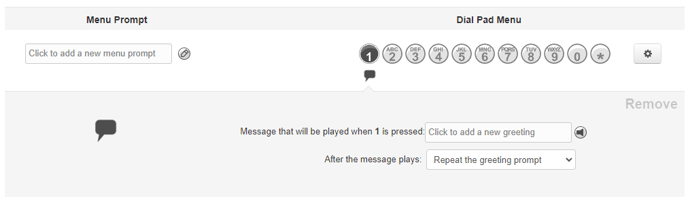
Here you can configure the greeting message you want to play when the number is pressed, and you can set what happens after the message has played.
You have the option to "Repeat the greeting prompt" which just repeats the initial greeting message, "Hangup" which ends the call, or you can have it follow one of the other routings you have setup on the Attendant.
Repeat Prompt
 Nothing is required to be configured here.
Add Tier

Here a second level to the Attendant has been configured that will play upon pressing the configured button.
Notice that on the second level a new configuration has appeared titled "previous menu", this just lets you configure a button on the second level that will route back up to the first menu when pressed.
TIP: You may notice that on the second menu there's no option to add a third menu and there is also no option to route to another Auto Attendant, so you may think at first glance that this means the platform is limited to only 2 levels of Attendants, however this is not the case.
Remember that creating an auto attendant creates a System User, and by default that system user is set to forward to the Auto Attendant it's attached to, this means you can create a second Attendant and then on the second tier of the first attendant route to the System User of the second attendant and this will drop callers into the first level of the second attendant.
This means you can effectively have an unlimited number of Attendant levels.
Attendant Options Panel
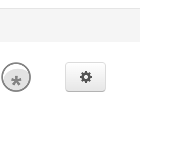
Click the above gear icon to bring up further options for the attendant

1 - Dial By Extension: Enabling this means that the caller can dial the extension of a user within the domain and it will route the call to that user.
2 - If no key is pressed... - Set what happens if the attendant times out with no key being pressed.
3 - If unassigned key is pressed... - Set what happens if the caller pressed a button that isn't configured.
4 - Timeout before first key press - Set how many seconds after the greeting message has played that the attendant will wait for the caller to press a key until following the routing set by "If no key is pressed...". Default is 5 seconds.
5 - Timeout after last key press - Set how many seconds the attendant will wait between key presses until it processes the current string of keys. Default is 3 seconds.
6 - Maximum key presses to collect - Set the maximum number of key presses the attendant will collect, after which it will process it straight away and route through. Default is 5.
Speech Keywords
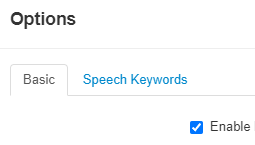
The "Speech Keywords" module is a useful feature that uses voice detection technology to listen to what the caller is saying then route the call based on detected words that the caller is saying.
First click the "Speech Keywords" tab at the top of the Attendant Options panel.

You will be a presented with a list of the configurations that you set in the dial pad options (note that dial pad configurations are required for this to work, if you have nothing configured in the dial pad then nothing will show up here for you to configure).
Click the user you want to add speech keywords to.

A field will show up letting you type in a keyword you want to assign, once done click add.

Once added a tag will show up to the right hand side of the configuration, now whilst the greeting message is playing the attendant will listen for the word "sales" in the callers voice, if it is heard then the call will route the call to user 2001. To remove a speech word, click the "x" icon to the right hand side of the tag.
You can from here continue to add more speech words to each configuration.
